Meatballs From Scratch

Meatballs From Scratch

This past month I have been quite spoiled. During the cold winter months construction is much slower; Reuben has been having so many days off from work. It’s like endless weekends spent together.

Instas January 2013

My days have been filled with leisurely walks through the woods, mugs of tea (several times a day), lovely reading, Pinterest (of course), organizing, photographing, and generally preparing for baby. It feels like the breath before the plunge; the calm before the storm.

In preparation for the new member of our family, I have been making up nutritious meals and slipping them into the freezer. So far I have stored up chicken broth, homemade bread, sausage and potato soup, and a couple bags of these meatballs.

Making meatballs is so much more fun with Reuben as my compatriot. He is constantly putting a smile on my face with his words as we exchange and steal kisses. And he does the hardest part: browning the meatballs.

Of course not all of the them make it to the freezer. We like to feast on them with mashed potatoes, gravy and peas, or with a red sauce over noodles.

Meatballs From Scratch | adapted from The Pioneer Woman Cooks: Food From My Frontier | makes 6-8 servings | PRINTABLE PAGE

Ingredients:

  • 6 slices crusty bread (or about 1.5 – 2 cups of panko or quick oats)
  • 3/4 lb ground beef (we use ground venison)
  • 3/4 lb ground pork
  • 3 garlic cloves, minced
  • 2 large eggs, beaten
  • 2 tablespoons dried parsley
  • 3/4 cup grated or shredded parmesan cheese
  • 1/4 cup whole milk
  • 1/4 teaspoon salt
  • fresh ground black pepper, to taste
  • coconut or olive oil, for frying

Directions:

1) If using bread slices, bake at 200°F (95°C) on a baking sheet in a single layer for about 30 minutes, or until dry. Pulse in a food processor or blender until crumbled.

2) Put the breadcrumbs and the remaining ingredients (besides the oil) in a large bowl and mix with your hands until everything is very well combined. Add more breadcrumbs or milk to create the right consistency. Form the meat into balls (I like mine a bit smaller than golf ball-sized) and line up on a cookie sheet. Place in the freezer for 10-15 minutes to firm up. Preheat your oven to 350°F (175°C).

3) Preheat the oil in a large skillet over medium-high heat. Cook the meatballs until browned on most sides, working in batches. Meatballs will not be cooked all the way through. Transfer to a baking pan and bake in preheated oven until cooked through, about 15-25 minutes.

4) Use the meatballs immediately or cool completely and store in the freezer. Simply reheat in the oven or thaw and cook in a red sauce or white gravy.

Follow my blog with Bloglovin

Dirty Chai Pancakes with Spiced Caramel Sauce + The Winner!

Dirty Chai Pancakes

Alright, time for the promised pancakes!

When Emma pinned these Dirty Chai Pancakes the other day, I knew I needed to make them. And so I did.

Reuben loved them. “These are really good pancakes,” he told me with his mouth full.

Dirty Chai Pancakes

Lovely Chai spices are mixed in with the dry ingredients. Fresh-ground espresso makes these “dirty” pancakes.

You should whip these up. Today. For breakfast, lunch or supper! They’re good any time.

Recipe Notes:

The original recipe called for spelt flour, but I subbed whole wheat and AP flour with great success. It also called for non-dairy milk, but I just used regular whole.

I didn’t have any maple syrup on hand, so I just mixed up a spiced caramel sauce. You could also mix a few spices into warmed maple syrup if you prefer.

Dirty Chai Pancakes with Spiced Caramel Sauce | adapted from The First Mess and Foods of Our Lives | serves 3-4 | Printable Page

Ingredients

For the Spiced Caramel Sauce

  • 1 cup sugar
  • 6 tablespoons butter
  • 1/2 cup heavy cream, room temperature
  • 1/4 teaspoon sea salt
  • 1/4 teaspoon ground cinnamon
  • pinch each of: ginger, cardamom, nutmeg and cloves

For the pancakes:

  • 1 1/3 cup whole milk
  • 2 tsp white wine vinegar
  • ¾ cup white whole wheat flour
  • ½ cup all-purpse flour
  • 2 tsp baking powder
  • 1 tsp baking soda
  • pinch of fine sea salt
  • 1 tablespoon freshly ground espresso
  • 1 tsp ground cinnamon
  • ½ tsp ground ginger
  • ¼ tsp ground cardamom
  • ¼ tsp ground nutmeg
  • pinch of ground cloves
  • 2 tbsp maple syrup or sweetener of choice
  • 1 tbsp melted butter or coconut oil
  • 1 tsp vanilla extract

Directions

To make the caramel sauce:

1) Place the sugar in a medium heavy saucepan over medium heat. Stir vigorously with a wooden spoon until the sugar melts. This will take a few minutes.

2) Once the sugar has all melted start adding the butter one piece at a time. Whisk until the butter is completely melted. Wait about 3 seconds and then add the cream slowly. Whisk as you add until the mixture is smooth and creamy. Remove from heat.

3) Add the salt and spices and whisk again a couple times just to incorporate.

To make the pancakes

1) Combine the milk and vinegar in a liquid measuring cup. Stir lightly and set aside to curdle for at least 5 minutes.

2) In a large bowl, whisk together the flours, baking powder, baking soda, salt, ground coffee, cinnamon, ground ginger, cardamom, nutmeg and cloves. Add the curdled milk, maple syrup, melted butter and vanilla extract. Stir gently to combine, taking care not to over mix.

3) Heat a large cast iron or nonstick skillet over medium heat. Brush the pan with melted butter. Drop 1/3 cup measures of the pancake batter into the pan. Allow the first side to cook for 1 to 1-½ minutes, or until bubbles pop on the surface and the edges appear dry and lightly browned. Flip the pancakes over and cook for another minute. Remove pancakes and keep warm. Repeat with remaining batter.

4) Serve pancakes with lots of butter, spiced caramel sauce or maple syrup. Yum!

Now for the winner of the Mignon Kitchen Giveaway!

capture5

Using random.org, I have selected a winner!

And the winner is…

Commenter #51, Carrie J.L. who said: “Fish sticks, homemade tartar sauce, and green beans! Simple, quick dinner =) Really enjoy your blog by the way! And can’t wait to check out this kitchen website! =)”
Congratulations, Carrie! I will be emailing you soon with further details.

Thank you all for participating in my giveaway.

Have a lovely day!

Dirty Chai Pancakes

Pumpkin Spice Latte Cupcakes

Pumpkin Spice Latte Cupcakes

Spicy sweet pumpkin cupcakes with freshly ground espresso, whipped cream and caramel sauce. Convinced yet?

As Reuben and I drove home from a birthday party for my little niece (I made these for the occasion), I mentioned that I was going to eat a cupcake when we got home. “My cupcake?!” Reuben protested. I assured him there were two left.

Pumpkin Spice Latte Cupcakes

You can check out the step-by-step instructions and recipe over on the Tasty Kitchen Blog.

Hope you’re having a marvelous Monday!

xoxo

Erica Lea

Roasted Cauliflower & Garlic Soup

Roasted Cauliflower Soup

Hello friends! Can believe August is over? This summer has been super-busy. I must admit to looking forward to the cooler months when things will slow down a bit and we can breathe.

Throughout the summer, the thought of heating up our small house by turning on the oven doesn’t excite me one bit. But as the weather begins to whisper of fall, my interest in cooking is rekindled.


Roasted Cauliflower Soup

My favorite fall/winter supper is soup. Once you know the basic steps for most soups, it’s so easy to customize and create to your preferences. And there’s just something cozy about a bowl of steaming soup.

Roasted Cauliflower Soup

But on to the soup at hand.

Cauliflower has never been my favorite veggie. On a scale of 1 to beets, it’s about an eight. Then one day, my grandma taught us how to make steamed cauliflower with buttered breadcrumbs. I softened. A little. Then I saw Katie’s recipe for Roasted Garlic & Cauliflower Soup. I caved.
Roasted Cauliflower Soup

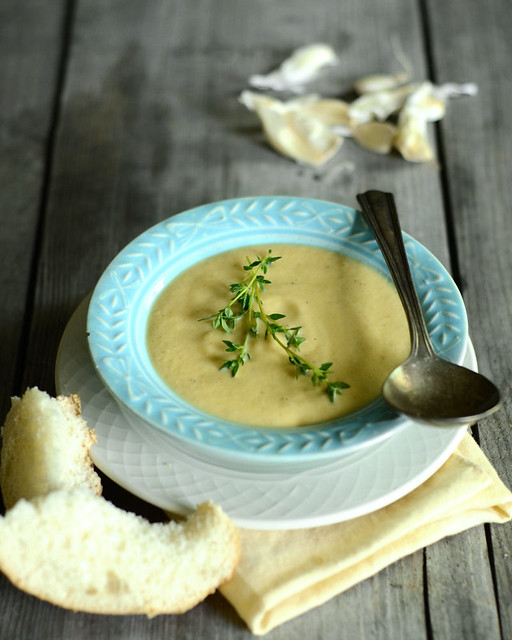
I’m so glad I did. Once roasted, the cauliflower develops a lovely flavor. The hints of celery, thyme and roasted garlic are amazing. You should definitely try this soup, even if you are a cauliflower hater. It just might change your mind!

Roasted Cauliflower Soup

TO READ THE REST OF THIS POST AND GET THE RECIPE, VISIT BUTTERED SIDE UP HERE

Strawberry Cheesecake Ice Cream

for-cfs

Hey, ya’ll! Sorry I’ve been AWOL for the past couple of weeks. But I have a very good excuse: I was sick with various things for two weeks. Yeah, it was nasty. AND I’ve had a severe case of writer’s block.

But I’m gonna make it up to ya’ll in the form of cookies + a giveaway! Look for it next week.

For now, go check out my guest post on the Tasty Kitchen Blog. This Strawberry Cheesecake Ice Cream is marvy. And it’s super-easy.

What are your plans for the long weekend?

Have an awesome day!

xoxo

Erica


Rhubarb Crunch + Being an Aunt

Rhubarb Crunch

The other day, my sister called me up and asked if I’d be willing to stay with the kids while she made a trip into town. Of course I said yes – being home alone is kinda lonely sometimes, and I love my little niece and nephew to death.

Rhubarb Crunch

While she was in town and the kids were napping, I decided to harvest some of her beautiful rhubarb and make a dessert.

Rhubarb Crunch

Everything went together easily and it baked up as described by the recipe. When the kiddos woke up from their nap, they were very interested in my creation and desperate to give it a try.

Rhubarb Crunch
Rhubarb Crunch

The guys got home from work and Reuben spied the rhubarb crisp. He, too was eager to try some – perhaps before supper?

Rhubarb Crunch

Just as we were getting ready to eat, my sister announced that she was going into labor. We quickly finished the meal and cleared away the dishes – but she need us to leave: NOW. We scooped up the kids (and the dessert) and headed home.

001

Judah and Ellie finally got to eat their dessert (with whipped cream, of course). We waited (somewhat) patiently for news of the arrival of the baby. Ten o-clock rolled around and no phone call. We put the kids to bed and settled down at the computer to relax a bit after a very busy day.

Susan

Just as Reuben and I were drifting off to sleep, we got the call. It’s a girl!

The next morning we packed up the kids and headed out to see the newest member of the family: Susan.

And what a doll she is.

008

I’ve gotta tell you, these kids are aDORable. But, like all little kids, they’re also a handful. They need help doing almost everything, from wiping their faces, to washing their hands, to getting dressed. They seem to have two modes: super energetic or sleepy. After two days of taking care of them I was exhausted.

All of this to say, I have a new appreciation for the unsung heroes of the world: mothers.

The only time you have to yourself is the few short hours when the kids are taking a nap. All other hours are spent keeping the kids fed, happy and safe. Just living becomes a chore.

But their happy faces and excited voices make it all worth while.

So to all mothers: my hat is off.

Rhubarb Crunch

But about this rhubarb crunch.

It’s a bit different than most crisp recipes I’ve made – you press half of the topping into the pan before adding the rhubarb. Also, you boil together sugar and water and pour over the rhubarb in the pan for sweetener.

I used whole wheat flour and a natural sweetener, partly because that was all that I could find in Audra’s pantry (go sis!). Also, she didn’t have any regular rolled oats on hand, so I used quick instead. Feeling a bit lazy, I decided to melt the butter and mix into the topping ingredients instead of cutting it in. A trick my mum taught me.

Reuben thought it was a tad too sweet, even though I cut out some of the sugar. Of course, rhubarb recipes usually call for a ton of sugar to combat the sourness of the fruit (is rhubarb a fruit or a vegetable?). And we’re not very tolerant of overly sweet desserts.

Would I make this again? Definitely. It was very easy, and I think it would easily convert to other fruits, such as raspberries.

Rhubarb Crunch | adapted from Taste of Home | printable page | make 6-8 servings

Ingredients:

  • 1 cup whole wheat flour
  • 1 cup old-fashioned or quick oats
  • 1 cup packed brown sugar (I used about 3/4 cup sucanat)
  • 1 teaspoon ground cinnamon
  • 1/2 cup cold butter, cubed (or melted)
  • 4 cups diced fresh rhubarb or frozen rhubarb
  • 1-1/3 cups sugar (I used 1 cup of sucanat)
  • 2 teaspoons cornstarch
  • 1 cup cold water
  • 1 teaspoon pure vanilla extract
  • whipped cream or ice cream, for serving

Directions:

1) Preheat oven to 350 degrees F. Grease a square baking dish (I used a pie pan because that’s all I could find).

2) In a medium bowl, whisk together the flour, oats, sugar, and cinnamon. Cut in the cold butter or mix in the melted butter. Press half of the topping into the prepared pan. Sprinkle the rhubarb on top.

3) In a small saucepan, combine the sugar and cornstarch. Slowly mix in the cold water and heat over medium until the mixture boils; boil for 2 minutes or until thickened a bit. Pour over the rhubarb in the pan.

4) Sprinkle with remaining crumb topping. Bake in the preheated oven for about an hour (start checking at 40 minutes) or until bubbly and beginning to brown.

5) Serve warm with ice cream, lightly sweetened whipped cream or plain cream.


Homemade Pistachio Pudding

004

When I was a little girl, I always requested my favorite dessert for my birthday, or any other special occasion: Striped Delight (shortbread crust, a cream cheese + whipped cream layer and pistachio pudding on top). I still remember being horrified when, for my birthday (probably my fifth or sixth), there was no pistachio pudding in the house so lemon pudding was substituted. I was crushed.

Homemade Pistachio Pudding

A while back, I spied a recipe for homemade pistachio pudding on Joy the Baker’s blog. I knew it needed to happen in my kitchen someday, but I only worked up the gumption to make it a few days ago.

The results? A creamy pudding with wonderful depth of flavor. Does it replace the fakey instant pudding I grew up with? No, it tastes nothing like that. Is that a bad thing? No. I’ll probably eat more instant pistachio pudding before I die, but this recipe is a lovely, more natural alternative.

002

Recipe Notes:

  • Reuben and I agreed that, while very tasty, this pudding was a bit too sweet. Next time I’ll be cutting out a bit of the sugar.
  • You can definitely use a natural sweetener (which is probably what I’ll do next time) if you wish. I used granulated because I wanted the pudding to be a pretty color for photos.

Homemade Pistachio Pudding | from Joy the Baker | printable page | makes 6 servings

Ingredients:

For the pistachio paste:

  • 1/2 cup salted pistachio nuts
  • 1/3 cup granulated sugar (or a natural sweetener)
  • 2 tablespoons water

For the pudding:

  • 2 cups whole milk
  • 2 large egg yolks
  • 1/3 cup granulated sugar (or a natural sweetener)
  • 2 tablespoons cornstarch
  • pinch of salt
  • 1 teaspoon pure vanilla extract
  • 2 tablespoons unsalted butter, softened
  • 1/2 cup pistachio nuts, chopped
  • whipped cream, for serving

Directions:

To make the Pistachio Paste:

Place pistachios in the bowl of a food processor.  Pulse until the nuts are in small bits.  Add the sugar and water, and blend until relatively smooth.

To make the Pudding:

1) Spoon Pistachio Paste into a medium saucepan.  Add the milk and whisk over medium heat.  Heat milk and pistachio until steamy and hot.

2) While milk is heating, whisk together granulated sugar, egg yolks, cornstarch and pinch of salt.  Mixture will be thick.  Keep whisking until it’s smooth.  Pour about 1/2 cup of the steaming pistachio milk into the sugar and egg mixture.  Whisk together.  Add another half cup of hot milk and whisk to incorporate.  Return the milky egg mixture into the saucepan over medium heat.

3) Heat pudding mixture over medium heat until thick and bubbly.  Whisk almost constantly.  You might also want to use a heat-proof spatula to stir the mixture, ensuring that the sides and corners of the pan aren’t burning. Boil for about 1 minute, or until thickened.  Remove from heat and stir in butter and vanilla extract, until butter is melted.  Pass cooked pudding through a fine mesh strainer set over a medium bowl.  This will ensure that any cooked egg bits don’t make it into the finished pudding.  Press the pudding through the strainer.  Add a few of the pistachio nut bits that the strainer catches back to the pudding if you’d like.

4) Spoon into small ramekins, place plastic wrap over the individual puddings (so the plastic touches the top of the pudding), and refrigerate for at least 4 hours, or overnight.

5) Top with lightly sweetened whipped cream and chipped pistachios. Pudding will last, covered in the refrigerator, for up to 4 days.


Bacon, Cheddar and Chive Scones + Monday Favorites

for-cfs

Hey everyone! I baked some super-delicious scones. You can check out the recipe + step-by-step photos & instructions on the Tasty Kitchen Blog. {LINK}

Stuff I love at the moment:

Recipes:

Provencal New Potatoes via Simply Recipes | Roasted Broccoli Soup via i am baker | Homemade Lemon Curd via Have Cake, Will Travel | Lemon Crepes via Cook Me Tender | Chocolate Jam Sandwich Cookies via Desserts for Breakfast | Banana Cake with Butterscotch via White on Rice Couple | Thai Tea Ice Cream via Amandeleine

Products:

Cake Plate | Edwyn Collins Mugg | Le Café Mug | Porcelain Lip Bowl | Bone China Spoons | Rosewood Serving Knife | Linen Apron | Monochrome Cup Set | Bowls | Bowls | And More Bowls | Be Happy Tea Towel | Rustic Honey Pot |

What are you lovin’ today?


Carrot Cake with Maple Cream Cheese Frosting

010

Super-sweet cakes are definitely not my cup of tea. Ever since I was a little girl I have disliked overly sugary desserts. Often times I would refuse birthday cake and opt for plain ice cream. Of course these days I’m a little more polite. I’ll eat my share of sickly-sweet treats; but give me a perfectly sweetened dessert and I’m much happier.

003

The frosting is another hang-up. Gobs of powdered sugar + only a tiny bit of butter = disgusting, in my book. To balance out the sweetness, frosting needs a good measure of fat, whether it be in the form of butter, cream cheese, cream or peanut butter.

007

Here I give you (what I consider to be) one of the best types of cakes: Carrot Cake with Maple Cream Cheese Frosting. The actual cake doesn’t taste like sugar fluff; it has flavor and a bit of spice and it’s nice and moist. The cream cheese in the frosting makes it pleasantly tangy and the maple syrup and vanilla give it a lovely flavor.

What do you think? Do you prefer your desserts with less sugar, or do you have a major sweet tooth?

Notes:

In keeping with my lower sugar preference, I cut out some of the sugar both in the cake and the frosting. If you have more of a sweet tooth than I do, you can go ahead and put in the full amount of sugar.

Of course I had to use half whole-wheat flour.

The original recipe called for nuts, but since Reuben prefers his desserts without them, I only put them on top.

Because I have always wanted to try it, I halved the recipe and baked the cakes in two 6-inch pans. I have provided the full-sized recipe below, but if you want to make a cute cake, just cut everything in half and bake in smaller pans.

Carrot Cake with Maple Cream Cheese Frosting | Printable Page | Makes 10-12 servings

Adapted from The Joy of Baking and Smitten Kitchen

Ingredients:

For the Cake:

  • 3/4 pound raw carrots (preferably organic), peeled and finely grated (about 2 1/2 cups)
  • 1 cup all-purpose flour
  • 1 cup whole wheat flour (preferably ww pastry flour)
  • 1 teaspoon baking soda
  • 1 teaspoon baking powder
  • 1/2 teaspoon salt
  • 1 1/2 teaspoons ground cinnamon
  • 4 large eggs
  • 1 1/4 cups granulated sugar
  • 1 cup coconut oil, melted and cooled, or any other flavorless oil
  • 2 teaspoons pure vanilla extract

For the Maple Cream Cheese Frosting:

  • 2 (8 oz.) packages cream cheese, room temperature
  • 1 stick butter, room temperature
  • 1 cup organic confectioners’ sugar
  • 1/4 cup pure maple syrup
  • 1/4 teaspoon pure vanilla extract

Directions:

For the Cake:

1) Preheat oven to 350° F. Butter two 9-inch cake pans and line the bottoms with circles of parchment paper.

2) In a medium bowl, whisk together the flour, baking soda, baking powder, salt, and cinnamon.

3) Using a stand mixer or a hand mixer, beat the eggs until frothy, about a minute. Slowly add the sugar & beat until thick and light colored, about 3-4 minutes. Add the oil in a slow steady stream. Beat in the vanilla. Add the flour mixture and mix just until incorporated. Fold in the grated carrots.

4) Equally divide the batter between the two prepared pans (I weighed the batter for precise measurement). Bake in preheated oven for 25-30 minutes, or until a toothpick inserted near the center comes out clean.

5) Remove from oven and allow the cake to cool, in the pan on a wire rack, for about 5-10 minutes. Turn the cakes out of the pans onto a cooling rack and allow to cool completely before frosting.

For the Maple Cream Cheese Frosting:

1) Beat the cream cheese and butter together until fluffy.

2) Sift the powdered sugar over the cream cheese/butter mixture and mix until well combined. Add the maple syrup and vanilla extract and beat until combined.


011


Best. Bread. Ever.

001

So I saw lots of people raving about how awesome no-knead bread is. Super easy and delicious.

“Yeah, right,” I thought. “You have to knead bread for ages to get a good crumb.” Boy, was I wrong.

Faced with having to knead bread by hand (horrors!) since we can’t afford a stand mixer just yet, I decided to give no-knead bread a try. After all, Hannah had made it and loved it. It had to be okay.

027

It’s more than okay. WAY more than okay. The crust is crunchy and the inside is soft, light and flavorful. And it takes about 5 minutes to mix up. In all honesty, I would make bread much less often if it weren’t for this recipe. Downside? Well, there’s no more excuse for buying store-bought bread when you can make it so easily.

Think you can’t possibly tackle making bread at home? Give this recipe a try. You’ll be so happy you did.

Notes:

Not only is this bread so quick & easy to throw together (you literally just dump all the ingredients in a bowl & mix it a bit with a big spoon), but it’s also very versatile. I have made this with sour milk in place of water and whole wheat flour in place of some of the white with awesome results.

If you must, you can skip the steaming step. The last couple of times I made this bread I forgot that part with no ill effects. But I highly recommend steaming for the best crust.

I really like shaping the dough into a boule, but you can also shape it into logs or braids.

No Knead French Bread | Printable Page | Makes 2 large loaves

From Artisan Bread in 5 Minutes a Day via Honey & Jam

Ingredients:

  • 3 cups of lukewarm water
  • 1 1/2 tablespoons active dry yeast
  • 1 1/2 tablespoons coarse salt
  • 6 1/2 cups all-purpose flour

Directions:

1) Place the water, yeast and salt in a very large mixing bowl. Dump in the flour and mix with a wooden spoon until everything is nice and moist. And you’re done mixing!

2) Cover the bowl loosely and let sit until it has risen and deflated a little. Now your dough is ready to be baked or stored in the refrigerator until ready to use.

3) To bake the bread: (If the dough is coming from the refrigerator, let it come to room temp before continuing) Wet your hands with water to prevent your hands from sticking and grab a piece of dough (I usually make half a recipe and use all the dough for one loaf, but you can make smaller loaves if you wish). Form it into a boule by pulling the sides of the dough towards the underside of the dough ball and rotating the dough until you get a roundish shape with a smooth surface. You can also shape the dough into logs or braids.

4) Transfer the dough to a piece of parchment paper (recommended) or a cornmeal-dusted cutting board. Let the dough rest and rise for about 40 minutes.

5) About 20 minutes before you’re ready to bake the bread, put a cast iron skillet or pizza stone on the center rack of the oven and place a roasting pan (I use a 13×9-inch pan) on the bottom rack of the oven. Preheat the oven to 450° F.

6) Dust some flour over the top of your risen loaf and cut a few slashes into the top about 1/4-inch deep. Transfer dough onto the skillet or pizza stone, quickly pour 1 cup of hot tap water into the broiler pan and shut the oven door to keep the steam inside. Bake for 30-40 minutes or until the crust is nice and brown. Cool completely before cutting. You may manage to wait that long…I never have.

002